
I was fortunate enough to get in on a cool campaign that allowed me to get an early look at ETI’s new EnviroTex Lite resin. Having never used resin before, I was slightly nervous about properly combining the components, about the fumes, about possibly becoming entirely encased Han-Solo-in-carbonite style….
Turns out that by reading the directions well and working in a well-ventilated environment (aka outside), the product is extremely easy to work with!
(It goes without saying that all the opinions in this post are mine. If you know me at all, you know I have a lot of opinions, and that few other people would claim them as their own.)

To make resin snowflake ornaments, you will need:
ETI EnviroTex Lite Polymer Resin
Mixing Cup Set
Plastic Gloves
Silicone Mold
Ribbon
Tape
Timer
Glitter (optional)

Prepare the molds by folding a length of ribbon in half and taping it into place at the top of the mold. The resin will fill the mold and encase the ribbon to make a hanger.
You could also wait until the ornaments are finished and drill a small hole in the ornaments to thread the ribbon through.

Prepare the materials for mixing. Since EnviroTex Lite requires a two-step mixing process, you will need to use two mixing cups.

Set your timer for one minute. You will vigorously stir equal parts resin and hardener for one minute in the first cup. For the six ornaments I made, I used 3 ounces of resin and 3 ounces of hardener.

Stir the mixture, scraping the sides of the mixing cup as you go. Try to avoid stirring in excess air, as that will make bubbles appear in the resin.

Pour the mixture into the second cup and stir for another minute.
You can see that inevitably some bubbles did form in the mixture. I found that many of those worked up to the surface when I poured the resin mixture into the molds.

Pour the resin mixture carefully into the mold.

The thicker the ornament, the longer the resin will take to cure.

For the first two snowflakes, I just poured straight resin into the molds.

For the second set of snowflakes, I poured in the resin and then sprinkled glitter on top of the resin. I was experimenting to see if the glitter would sink into the resin or not.

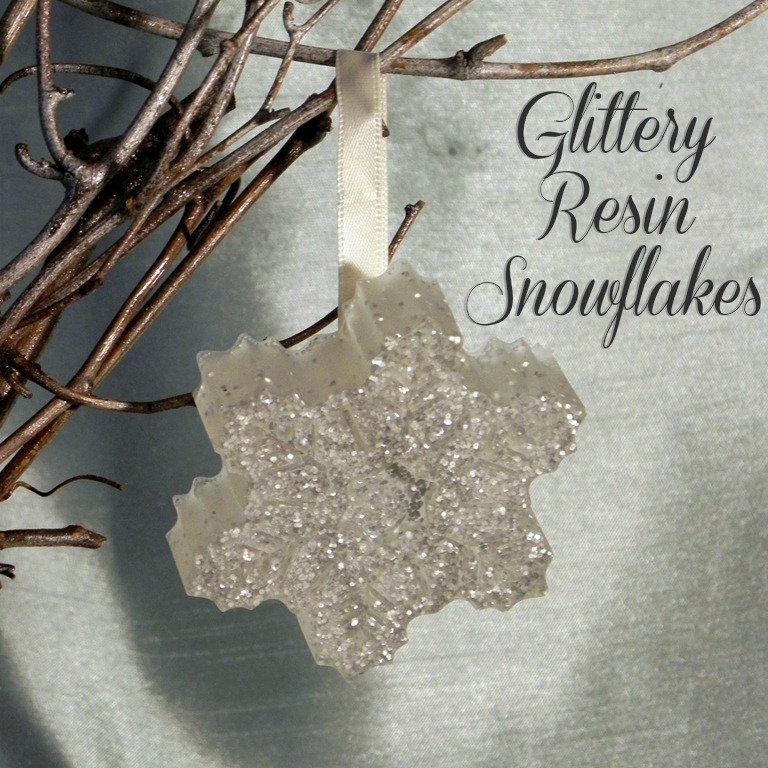
For the final set of snowflakes, I stirred glitter into the resin before pouring.

This evenly distributed the glitter in the resin. Ooh, sparkly!

Move your mold to a safe spot, cover, and wait.
These ornaments are 1/2-3/4 inches thick and were hard after 8 hours. To be safe, I let them cure the full 24 hours before removing them from the mold.

Because the silicone mold is so flexible, you can peel the mold back and pop out each ornament!

The snowflake on the far left is the resin only snowflake. The glitter that was sprinkled onto the back of the second set of snowflakes did NOT settle into the resin, but made a kind of mirrored backing to the ornament, these pictures really don’t do it justice. The far right snowflake is the result of mixing the glitter right into the resin.

See how the ribbon is embedded into the resin? This makes the ribbon very secure for hanging.

Although I was a bit nervous to work with resin for the first time, EnviroTex Lite is surprisingly straightforward to use. The directions that come with the product are clear and direct, which makes the whole process easy for even a first-timer like me.

I am loving the final product!
ETI sent me this product to try out. You won’t believe all that you can do with this product. Envirotex Lite was created by Environmental Technologies Inc. (ETI), which is the home for many resin and mold making products.
The use of resin in jewelry making, mixed media and paper arts continues to grow in popularity. Today, artists are using ETI’s products in many crafty ways and they will be showcasing these works of art on their new blog “Resin Crafts”.
FOR MORE CREATIVE PROJECTS USING ETI RESIN, CHECK OUT THESE LINKS!


I love your project! It really turned out beautiful and has me hunting for a snowflake mold now!
Holy cats those are cool! And how clever of you to use the silicone baking molds…I have some heart molds I could use. Wahoo!
Yay, fun. Those are gonna be great decorations for your christmas tree! The silicone molds are awesome – I used plastic molds & the unmolding process was NOT FUN.
Oooh! I need to try the silicone molds. Thanks for the great tips. And the post was totally made more awesome by the Han Solo reference!